Customizing the Client Portal Design
First impressions count. A branded portal shows you care about details. We're going to decide on colors, add your logo and favicons.
Step 1: Go to Memberships > Client Portal > Settings > Branding
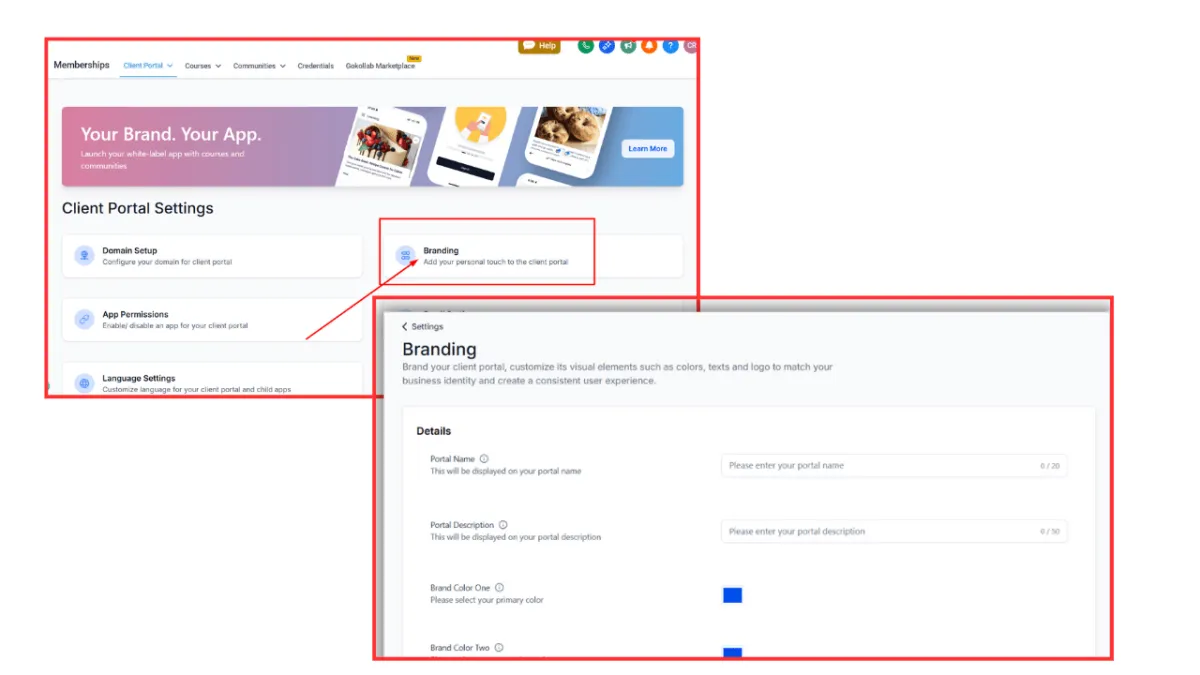
Step 2: A new page opens. From here, you need to fill out all the needed information for the following:
Portal Name - not more than 20 characters. Most commonly used names are Learning Hub, Client Hub, The Success Portal, The Client Vault, and Member Dashboard.
Portal Description - not more than 50 characters, e.g. "Log in. Learn.", "Your journey to success begins here", "Resources, guides, and support", etc.
Brand Color One - enter the hex code of your primary color
Brand Color Two - enter the hex code of your secondary color
Upload your Favicon - aspect ratio 1:1 and maximum of 16 x 16 px
Create a Portal image - aspect ratio 8:9 and maximum of 1920 x 2160 px
Upload your Logo - aspect ration 1:1 and maximum 200 x 200 px
Your support email - the email that answers all client inquiries
Copyright protection - if you have one